

Thinking about installing solar panels yourself in North Las Vegas? A DIY approach can lower the cost, but Clark County has strict permitting and building code requirements. Missing a step can lead to failed inspections, safety issues, or the need to redo work. This checklist walks through the process from initial design to final approval.
Note: To keep up with fast-moving solar trends in Nevada, I use AI tools to help with research and writing. Every post is personally reviewed and edited by me.
When DIY Solar Makes Sense and When It Does Not
Installing solar panels yourself can reduce labor costs, but it is not practical for every homeowner in North Las Vegas. Roof conditions, desert heat, and local code requirements all affect how difficult the project will be. Here’s a practical look at when DIY makes sense and when it does not.
When to Go Full DIY
Doing it yourself makes sense if:
- Demonstrated Trade Proficiency & High-Heat Thermal Tolerance: You possess direct hands-on experience in electrical infrastructure or roofing trades, alongside the physical conditioning required to safely execute high-elevation installation work under extreme desert heat conditions.
- Streamlined System Architecture & Single-Story Flat Roof Profile: Your property features a straightforward single-story residential structure with an easily accessible flat or south-facing roof orientation, utilizing a direct grid-tied configuration without complex multi-stage battery storage integration.
- Jurisdictional Compliance & Permitting Management: You are fully equipped to navigate Clark County building and safety regulations, including managing local permit documentation, coordinating utility interconnection requests, and scheduling required municipal inspections.
When to Pump the Brakes
You might want to skip the DIY route if:
- Grid-Tie Electrical Risks & High-Voltage Interconnection: Integrating high-voltage DC array wiring and executing AC tie-ins to your primary electrical service panel presents substantial shock and arc-flash hazards. Due to utility compliance standards and physical safety risks, non-licensed installers routinely contract a licensed electrician for this phase.
- Structural Integrity & Roof Penetration Vulnerabilities: Securing mounting footings and flashing assemblies requires structural attachment directly into roof rafters. Improper seal installation or incorrect fastener torque jeopardizes the roof membrane, risking costly structural water intrusion and long-term decay.
- System Architecture & Hardware Integration Complexity: Incorporating multi-string battery storage enclosures, microinverter trunks, or rapid-shutdown systems significantly escalates technical difficulty. Complex wiring topologies demand specialized diagnostic equipment and advanced troubleshooting protocols to ensure safe commissioning.
- High-Elevation Safety Risks & Physical Labor Demands: Transporting heavy photovoltaic modules onto steep roof pitches introduces severe falls, strain, and heat-exposure risks. Without specialized lifting gear, safety harnesses, and an experienced crew, the physical hazards often outweigh potential labor cost savings.
The Hybrid Approach
You do not have to choose between lower cost and code compliance. Some homeowners in North Las Vegas mount the racks and panels themselves and hire a licensed electrician for the wiring and interconnection paperwork. This reduces labor costs while keeping the electrical work within code.
For more details about evergreen solar topics, explore our 2026 guides on understanding Nevada SB 440, solar repair & insurance claims, and the caliche dust tax.
Cutting Through the Red Tape: Your 2026 Guide to North Las Vegas & Clark County Permits
Getting your solar project permitted in the North Las Vegas and Clark County area is easily the least glamorous part of a DIY build. It can feel like a maze of paperwork but getting it right the first time keeps your project on track and ensures your home stays safe. Here is exactly what the process looks like, step-by-step.
The Permitting Roadmap
Conduct Jurisdictional & Structural Due Diligence: Prior to procurement, carefully evaluate the Clark County Building Department codes, NV Energy interconnections, and any municipal regulations specific to North Las Vegas. Secure advance written authorization from your Homeowners Association (HOA) to satisfy Covenants, Conditions, and Restrictions (CC&Rs), and verify that your roof framing possesses adequate dead-load structural capacity for the added equipment weight.
Assemble the Technical Permit Package: Compile complete architectural and electrical plan sets for municipal plan review. Your submittal packet must include a precise rooftop structural layout, a detailed electrical single-line diagram (SLD) depicting conduit runs and overcurrent protection, manufacturer equipment specification sheets, and wet-stamped structural engineering calculations verifying wind-uplift resistance for desert conditions.
Submit Plan Sets via the Municipal Portal: Upload the finalized documentation package to the appropriate local building department portal and remit the required initial plan-check fee, which typically ranges from $300 to $800 based on system capacity. Municipal building and electrical plan examiners will then review the submission for structural and National Electrical Code (NEC) compliance.
Address Plan Examiner Corrections (Redlines): Prepare to resolve technical comments or layout adjustments requested by local plan reviewers. Plan redlines are a standard part of the plan-check process; carefully modify the engineering drawings to address each specific code note and resubmit the revised plan set promptly for re-review.
Remit Final Fees & Secure Building Permits: Upon formal plan-check approval, pay any outstanding permit balances and retrieve the official building and electrical permits. Securing these issued documents grants formal regulatory authorization to begin physical mounting and electrical installation work safely.
Coordinate Municipal & Utility Field Inspections: Schedule the required series of field inspections with local building officials. Inspectors will typically verify structural attachment footings and flashing work before panel placement, conduct a thorough inspection of the high-voltage DC/AC electrical wiring and grounding, and issue final sign-offs required prior to utility interconnection and system commissioning.
Red Flags to Watch For
Local inspectors currently focus closely on a few specific requirements:
- High-Velocity Wind-Uplift Standards: Due to severe, sudden wind gusts characteristic of the Las Vegas Valley, structural racking calculations undergo rigorous municipal engineering review to ensure compliance with local wind-load resistance standards.
- NEC Rapid Shutdown & Safety Labeling Requirements: National Electrical Code (NEC) rapid shutdown compliance—enabling immediate module-level voltage de-energization—along with strict, standardized, highly visible warning labels, is strictly enforced for first-responder safety during emergencies.
- Energy Storage System (ESS) Plan Review Protocols: Integrating battery storage escalates the permitting review tier, triggering a comprehensive technical evaluation of fire mitigation, clearance spacing, and structural load calculations that exempts the project from simplified fast-track routing.
A straightforward roof installation typically takes 4 to 8 weeks to move through the permitting process. Systems that include batteries or more complex roof layouts often take 2 to 4 months from submission to final approval.
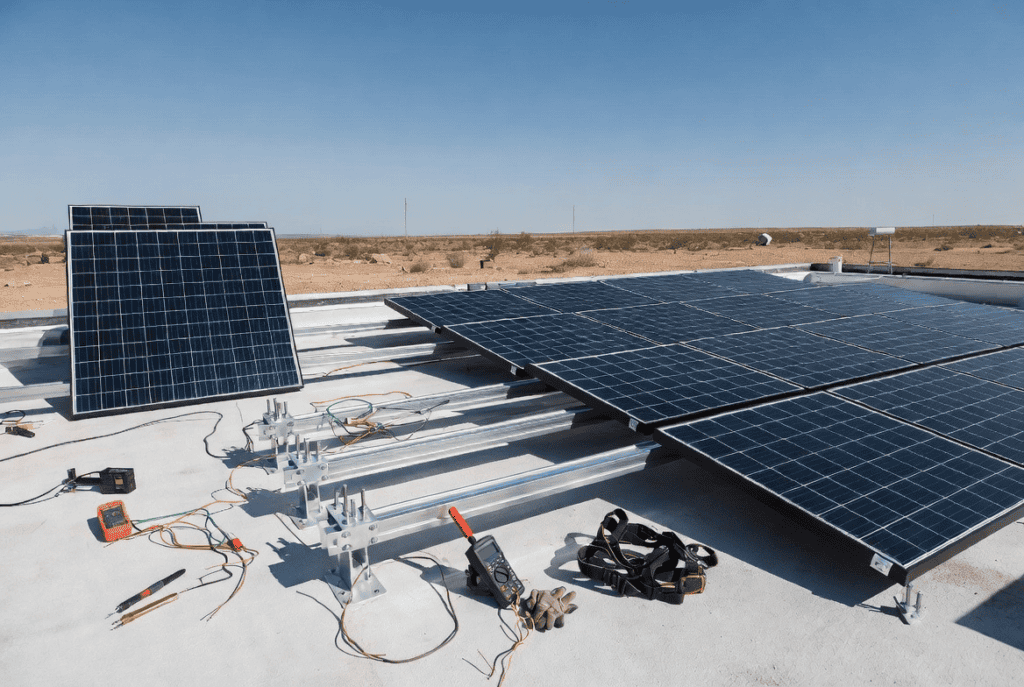
The Ultimate North Las Vegas DIY Solar Checklist: From Roof to Grid (2026)
A DIY solar project involves several distinct stages. Breaking the work into clear phases helps keep the project organized and reduces the chance of inspection issues. Use this checklist to track progress from initial measurements through final approval.
Phase 1: The Prep Work (Before You Buy Anything)
Before purchasing equipment, confirm that the property is a suitable candidate for solar.
- Conduct a Comprehensive Roof Condition Assessment: Photovoltaic systems carry a operational lifespan of 25+ years. If your roof underlayment or surface material is over 15 years old or exhibits visible degradation, complete necessary roof replacements or repairs prior to panel installation.
- Perform Irradiance & Solar Resource Mapping: Utilize modeling tools like NREL’s PVWatts to evaluate south- and west-facing usable roof area, verify array tilt angles, and quantify potential shading obstructions from nearby vegetation or adjacent structures.
- Calculate Load Profiles & Sizing Requirements: Analyze 12 to 24 months of historical NV Energy utility statements to establish average kilowatt-hour (kWh) consumption patterns, peak summer demand spikes, and required system nameplate capacity.
- Secure Written HOA Architectural Approval: If residing within a Homeowners Association (HOA) community, submit your formal architectural review application and obtain written approval adhering to neighborhood Covenants, Conditions, and Restrictions (CC&Rs) prior to purchasing hardware.
- Procure Compatible Equipment & Hardware: Cross-reference component spec sheets—including PV modules, inverters, racking systems, and overcurrent protection devices—to verify 100% electrical, mechanical, and structural racking compatibility before placing orders.
Phase 2: The Paperwork & Permitting
Do not skip this phase. Clark County inspectors check for proper permits, and unpermitted work can result in fines or required corrections.
- Complete the Official Municipal Application: Fill out and verify all administrative entries on the official Clark County building permit application form.
- Draft Architectural Site Plans & Rooftop Layouts: Generate detailed, scaled site drawings indicating array placement, set-back clearances, equipment mounting locations, and roof access pathways.
- Develop the Electrical Single-Line Diagram (SLD): Draft a complete electrical schematic detailing string configurations, conductor sizing, conduit runs, overcurrent protection devices, rapid shutdown components, and service panel interconnections.
- Compile Equipment Spec Sheets & Safety Certifications: Gather detailed manufacturer specification sheets, installation manuals, and mandatory UL listings for all PV modules, inverters, racking systems, and energy storage hardware.
- Secure PE-Stamped Structural Calculations: Obtain wet-stamped structural engineering calculations from a Nevada-licensed Professional Engineer (PE) to verify racking integrity and wind-uplift resistance under local high-velocity wind standards.
- Submit Digital Packet & Remit Plan-Check Fees: Upload the complete documentation package to the Clark County online portal and pay the required initial plan-review filing fees to initiate formal municipal review.
Phase 3: The Heavy Lifting (Physical Installation)
This is the physical installation phase. Avoid working on the roof during the hottest part of the afternoon.
- Install Structural Flashing & Mounting Hardware: Fasten mounting footings into designated roof rafters, applying high-grade waterproofing sealant and code-compliant flashing assemblies at every penetration to ensure a watertight structural seal.
- Assemble & Secure the Racking Substructure: Position and connect the racking rails to the mounting brackets, adhering strictly to the manufacturer’s specified torque metrics and structural span limits.
- Mount & Clamp Photovoltaic Modules: Secure the solar modules onto the racking system, utilizing precise torque settings on mid-clamps and end-clamps to prevent frame stress or micro-cracking.
- Execute Code-Compliant DC Wiring & Conduit Management: Route high-voltage DC string conductors through grounded metallic or non-metallic conduit, securing all under-array wiring with UV-rated cable ties to maintain clean, elevated runs.
- Install Inverter System & AC Disconnect Assembly: Mount the main inverter unit and the exterior utility-accessible AC rapid-disconnect switch, maintaining all required NEC working clearances and structural attachment protocols.
- Commission System Communications & Monitoring Hub: Connect and configure the local internet monitoring bridge via Wi-Fi or hardwired Ethernet, establishing real-time telemetry and module-level performance tracking.
Phase 4: Electrical & Safety Checks
This is the highest-risk phase of the project. If you are not a licensed electrician, this is the point to hire a local professional for the electrical work.
- Establish Continuous System Equipment Grounding: Electrically bond every metal component, structural rail, and module frame to the grounding electrode system in full compliance with National Electrical Code (NEC) equipment grounding standards.
- Install Array-Level Rapid Shutdown Systems: Integrate NEC-compliant rapid shutdown devices within the designated boundary perimeter to guarantee immediate module-level DC voltage de-energization during emergency response operations.
- Apply Mandatory Standardized Safety Labeling: Affix weatherproof, reflective, color-coded warning labels and system schematics to all isolation switches, disconnect enclosures, conduit runs, and service equipment as required by local enforcement authorities.
- Integrate Overvoltage Surge Protection: Install primary AC/DC surge protective devices (SPDs) at key junction interfaces to shield internal power electronics and array components from transient grid voltage spikes and atmospheric surges.
- Execute Main Service Panel Interconnection: Complete the final AC tie-in to the main service bus—strictly via a licensed electrical contractor—ensuring proper busbar loading, backfeed overcurrent protection, and utility-side compliance.
Phase 5: Crossing the Finish Line
Only a few remaining steps stand between the installation and final approval.
- Coordinate & Pass Municipal Field Inspections: Schedule and successfully pass required local building inspections, including structural attachment verifications before panel concealment, rough electrical safety checks, and the final combined building and electrical sign-off.
- Submit NV Energy Interconnection & Net Metering Application: File your formal generation interconnection and Net Metering (NEM) packet with NV Energy, including final permit documentation and approved single-line diagrams to initiate utility review.
- Await Permission to Operate (PTO) & Energize System: Upon receiving official written Permission to Operate (PTO) from NV Energy, complete startup safety checks, close system disconnects, and officially energize your photovoltaic array.
- Activate Manufacturer Warranties & Monitoring Software: Complete online equipment registration for your inverter, batteries, and PV modules to activate multi-year manufacturer warranties and finalize your real-time performance monitoring dashboard.
- Archive Permanent Compliance & Project Records: Organize and securely store all municipal permits, inspection sign-off cards, utility approval letters, structural engineering stamps, equipment receipts, and warranty documents for future reference or home resale.
🛠️ Your Safety Gear Checklist Do not step onto the roof without:
- Certified Fall-Protection Harness & Anchored Lifeline System: Full-body safety harness properly fitted and tied off to an OSHA/ANSI-approved roof anchorage point prior to stepping onto elevated work surfaces.
- Standard Personal Protective Equipment (PPE): Heavy-duty leather or cut-resistant work gloves, UV-rated safety glasses, non-slip steel-toe work boots, and an OSHA-compliant hard hat to mitigate impact, thermal, and falling-object hazards.
- Calibrated Voltage Detector & Digital Multimeter: A CAT III/CAT IV 1000V-rated digital multimeter and non-contact voltage tester to verify zero energy state and eliminate arc-flash or electrocution risks before handling conductors.
- Class C-Rated Electrical Fire Extinguisher: A fully charged, easily accessible Class C (or ABC-rated) fire extinguisher maintained within immediate reach of the work area to address potential electrical ignition hazards.
The Rules of the Roof: Clark County Solar Codes You Can’t Ignore (2026)
Local building codes can be dense, but they matter for a DIY solar installation. Clark County has updated its standards, and inspectors check for compliance. Failing to meet the requirements can delay approval and create safety issues. Here’s what a DIY system typically needs to satisfy for a first-pass inspection.
1. Batten Down for the Winds
Desert wind is a structural concern for rooftop solar. Racking systems must be designed to handle high wind loads, often in the 115–130 mph range. If the system exceeds standard weight or spacing limits, a structural engineer’s stamp is typically required to confirm the array will remain secure.
2. The 30-Second Kill Switch (Rapid Shutdown)
For first-responder safety, Clark County enforces NEC 690.12 rapid shutdown requirements. In the event of a fire, the system must be able to reduce rooftop voltage to a safe level within 30 seconds of the main switch being activated. A clearly labeled shutdown device must also be installed near the main electrical panel.
3. Grounding and Labeling (Where Most DIYers Fail)
All metal components near electrical connections must be properly grounded. Rails, panel frames, and inverter enclosures need continuous bonding. Labeling is another common inspection issue. Clark County requires specific high-visibility, UV-resistant warning placards on junction boxes, AC/DC disconnects, and the main service panel. Missing or incorrect labels can cause a failed inspection.
4. Firefighter Pathways
You cannot cover the entire roof with panels. The International Fire Code requires clear setbacks for firefighter access. In most cases, a pathway of roughly 3 feet must remain open along roof ridges and hips so responders can move and vent the roof without stepping on panels or live wiring.
5. Desert-Proof Tech Standards
Equipment must meet specific safety certifications. Inverters need UL 1741 listing to interconnect with the grid. Battery systems must meet UL 9540 thermal runaway standards and be installed with adequate ventilation. Proper heat management is especially important when ambient temperatures reach 115°F.
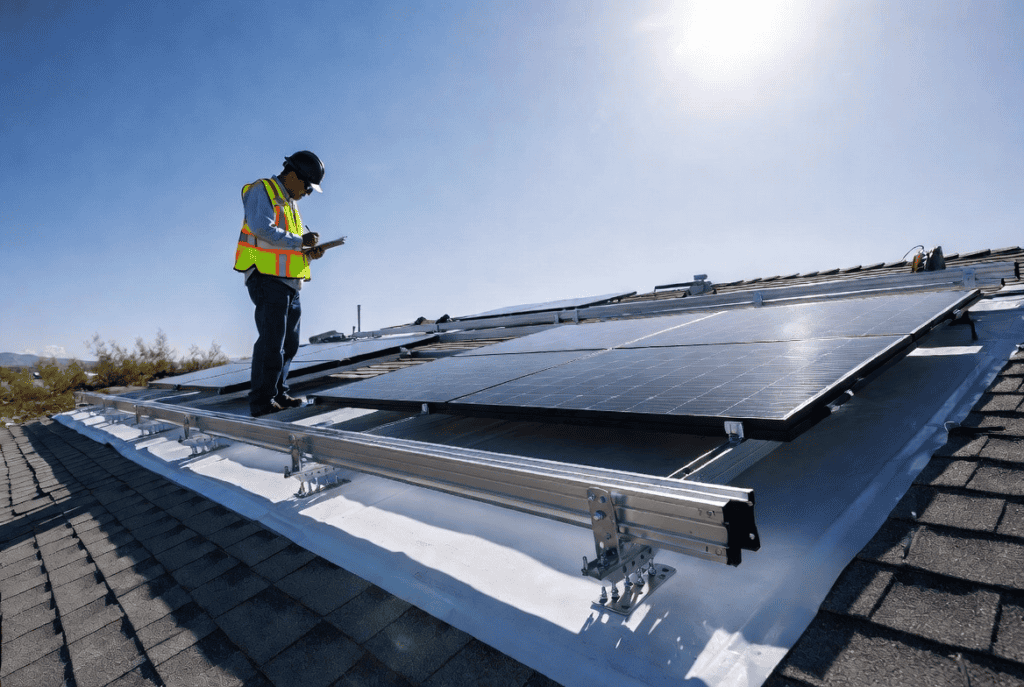
Passing the Inspection Gauntlet: What North Las Vegas Looks For (2026)
Passing city and county inspections is often the most challenging part of a DIY solar installation in Southern Nevada. Inspectors apply the same standards to homeowner projects as they do to contractor work. Understanding the common failure points helps improve the chance of approval on the first visit.
The Step-by-Step Inspection Lineup
Inspections are typically required at multiple stages, not only at the end. They must be scheduled in sequence so inspectors can review the work before it is covered:
- Structural Rough-In Inspection: Conducted after securing mounting footings, flashing assemblies, and support rails to the roof, but prior to module placement. The municipal inspector inspects rafter penetration accuracy, structural fastener torque, and flashing sealant integrity to verify waterproofing and dead-load capacity.
- Electrical Rough-In Inspection: Executed while junction boxes, wire runs, and conduit pathways remain exposed. The inspector checks conductor ampacity, equipment grounding continuity, bonding jumpers, and electrical box sizing before wire runs are concealed or final inverter terminations are executed.
- Final Building & Electrical Sign-Off: Performed once all photovoltaic modules are secured, system wiring is enclosed, and rapid shutdown devices are fully operational. The building official conducts a comprehensive evaluation of the overall installation, verifying safety clearances, proper NEC warning labels, array grounding, and structural completion.
- NV Energy Interconnection & PTO Inspection: Following municipal plan approval and field sign-off, NV Energy performs an independent utility evaluation of the service panel meter socket, AC disconnect location, and net-metering interface prior to issuing formal Permission to Operate (PTO).
Common Fail Points
- Improper Equipment Grounding & Continuity Gaps: Omitted grounding lugs, loose bonding jumpers, or undersized equipment grounding conductors (EGCs) will result in an immediate inspection failure (“red tag”). Every exposed metal enclosure, racking rail, and module frame must form a continuous, unbroken electrical bond back to the primary grounding electrode system.
- Non-Compliant NEC Warning Labeling & Markings: Omitting required safety placards or failing to adhere to mandatory color, font, and reflectivity standards is the single most common cause of inspection rejection. Code strictly dictates placement, wording, and formatting—such as white, weather-resistant lettering on a reflective red background for rapid shutdown identification—across all conduit pathways, disconnect enclosures, and service interfaces.
- Missing PE-Stamped Calculations & Unverified Fastener Torque: Failing to present wet-stamped structural engineering calculations on-site or failing to demonstrate that racking attachment footings are torqued to exact manufacturer specifications will halt inspection approval. Inspectors require verifiable proof that the array mounting structure satisfies local wind-load and dead-load parameters.
- Rapid Shutdown Operational Failure: Array-level rapid shutdown systems must successfully de-energize rooftop DC conductors within the designated boundary perimeter to a touch-safe voltage threshold (under 30 volts) within 30 seconds of AC disconnect initiation. Field inspectors will actively simulate a power disruption to test and verify immediate shutdown response time.
Pro tip: Photograph your work thoroughly before panels go down or junction boxes are closed. If an inspector questions a structural connection or wire type that is no longer visible, clear photos can help avoid the need to remove panels for verification.
If the inspection fails, the inspector will issue a correction notice listing the specific items that need to be fixed. Correct the issues and reschedule. Repeated failures can add re-inspection fees and delay final approval, so it is worth verifying the work carefully before each visit.
Thank you for reading! If you have any feedback or a specific Nevada solar topic you’d like us to cover next, please reach out directly at admin@nevadasolarguide.com.


